Sunday, 4 December 2016

Really? starting services properly is that hard

I reaaaaally don't care if it's Raspbian or Debian screwing up the startup of nfs-kernel-server, it should have been fixed long ago.

And there are endless posts on debian raspbian and other forums about this, many with fixes that only work in very specific (unstated) circumstances.

In the end I just got out me Glasgow screwdriver and
stuck a new line in crontab to postfix the mess.

sudo crontab -e

and add the line
@reboot              sleep 5 ; /usr/sbin/service rpcbind start ; sleep 10 ; /usr/sbin/service nfs-kernel-server restart

Saturday, 3 December 2016

Astrophotography - the mount driver

I am using an old Vixen GP mount with the Vixen MT1 stepper motors.

I am using a raspberry pi with Pololu stepper drivers. I've described this in an earlier post.

Now comes the job of making this work - initially for guiding and hopefully later for 'goto' as well (albeit that will be a bit slow with these motors).

The ingredients are:
  1. pi model B
  2. 2 pololu drivers mounted on a little HAT card as described here
  3. a 24v power supply to drive the stepper motors
  4. CAREFULLY set the current limit on the pololu driver carriers
  5. write a test program to do some basic testing of the drivers / motors
  6. Prepare a second raspberry pi to run this nice autoguiding software
  7. do a quick hack to enable Gordon'd autogider software to talk to my driver software.

I have done a quick video of the test program running the code to slew the scope as fast as the steppers can go here.
and below is the gory details.....

Sunday, 28 August 2016

Very simple web serving for timelapse with Python on Raspberry Pi

Why?

I messed about with few different stacks for running a web server on pi, and most are complicated, in particular being complicated to configure as well as being large complicated animals that provide a lot of functionality (and overheads) that were of no real use to me. I wanted something that was:
  1.  simple to install / set up
  2. suitable for use as an 'inside' home web service (i.e. not exposed to the nasty world outside)
  3. able to run reasonably fast
  4. really simple to use (from python in particular)
Some very simple ways to do this use cgi, but I soon found this method awkward to use as well as looking like there were significant performance overheads. I switched to http.server.HTTPServer which I like and provides a 'shape' of framework I am comfortable with.

What?

On a LAN connected raspberry pi 3 this approach will happily serve up to 200 requests per second - as long as the overall network bandwidth doesn't get too high.

The test I used serves up images on demand to create a virtual movie. It is driven from javascript in the web page. The individual images were just under 20k bytes on average.

I wanted to minimise the load on the Raspberry Pi and keep the user interface simple to use and responsive. To do this the python web server is very simple and - after serving up the initial page - just responds to requests from the client.

The web page implements the user interface control functions in javascript and fires off requests to the web server.

The web server runs happily on Raspberry Pi (including zero) and on my ubuntu laptop. It appears to work well with Firefox, Chrome and Internet Explorer on laptops / PCs. It does not work in Edge, but as I have little interest in Windoze , I'm not really interested in the ie / edge use.

It will run on reasonably fast phones / tablets, but not at high framerates; my old Galaxy S2 isn't much use, but a Hudl2 works well as long as the framerate is kept low.

This is just a proof of concept, so presentation and error handling are minimal / non-existent, and functionality is limited.

How?

There are 2 files:
  • a python3 file (the server) of around 100 lines
  • an html file (the client) of around 200 lines
The simple webserver builds an index to all the jpeg files in the given folder, and serves a web page which then allows various javascript functions to move around within the images and play them back at various speeds by controlling framerate and stride.

Tuesday, 12 July 2016

poe thoughts and findings with Raspberry pi

I've used 2 splitters for this. One specifically sold to power Raspberry Pi, the other a more generic one, but it is cheaper and more flexible (it can output at 5V, 9V or 12V - obviously for direct power to a pi, it is on the 5V setting.

The switch in front is a Cisco SG200 08P, which is expensive, but provides close control and reporting on what is going on with each port. Much cheaper PoE switches (like the Netgear prosafe range) are available (but typically don't have the reporting I used here).

The ASIX AX88179 is the main part of a USB3 to Gigabit ethernet adapter. The Pi can drive significantly more than 100Mb with a Gigabit adapter (even although it is USB2). all the Gigabit USB adapters seem to be USB3 (quite sensible if you want to get close to full utilisation). Also being Gigabit means that potentially the green ethernet savings should kick in.

As a final test I had the Pi Zero running RPi cam control streaming live to a web browser on another PC, and with 2 servos waving the camera about. This took the power up to nearly 5 watts with everything running smoothly - apart from the live camera feed which was just a blur!

Conclusions

The TP-Link PoE adapter is the better solution - more flexible, more efficient AND cheaper.

The Official Rpi WiFi dongle seems to run at about 1/2 watt when idle.

The USB3 to Ethernet adapter I got is VERY inefficient - about 1 watt doing nothing.

You can run a pi very reliably this way - even with the camera and little servos running.

poe splitterloadpoe classpower (mW)current (mA)voltagegreen ethernetnetwork
RocksolITpi 3 idling419004247Nopi Ethernet
RocksolITpi 3halted48001747Nopi ethernet
TP-Link PoEpi 3 idling018004047Nopi ethernet
TP-Link PoEpi 3 halted07001547Nopi ethernet
TP-Link PoEpi 3 idling016003447Nonone
TP-Link PoEpi 3 idling025005447NoASIX AX88179
TP-Link PoEpi 0 idling012002647NoRPi wifi dongle
TP-Link PoEpi 0 halted0400947NoRPi wifi dongle
TP-Link PoEpi 0 idling010002247NoUSB3 - Gigabit no lan cable
TP-Link PoEpi 0 idling017003647YesUSB3 - Gigabit connected
TP-Link PoEpi 0 idling07001547Nono network adapter
RocksolITpi 0 idling413002847NoRPi wifi dongle
RocksolITpi 0 idling48001747Nono network adapter
TP-Link PoEpi 0 busy + servos046009047NoUSB3 - Gigabi

Monday, 11 July 2016

Making google cardboard work properly (with a web browser) part 2

Now I could set (and adjust) the lens spacing in my Google Cardboard, I needed a way to set up the spacing properly, but first.....

Rule 1: your display needs to have at least an 11cm wide viewable area - preferably a bit more. Without this width, significant areas of the image will only be visible to one eye - oh and I might need to adjust the app so it allows the panel to go off the edge of the screen.

To help with setup, I prepared a freestanding web page that enables settings to be tweaked, and saves those settings to local storage so they are persistent.

This web page can also be used as the base for display of stereogram images and similar things (like live streaming from stereo webcams), and can be run on devices that don't support the google cardboard app, so you can use google cardboard (the cardboard) without google cardboard (the app) - although not with any google api based apps obviously.

Now to getting the lens spacing properly setup. For me this means that:
  1. on first looking through the cardboard, the image should look right immediately - no waiting for the image to 'come together'
  2. shutting you eyes for for a few seconds and opening them again should likewise mean the image 'works' immediately
  3. The image should remain consistent across the whole field of view - no queasy feelings as you look towards the edges and corners of the view

web pages and other stuff.

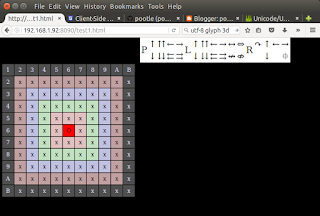
I wanted to make the little app as widely usable as possible - not just android - and to that end it is effectively a freestanding web page - here is a typical screenshot of the app in motion:

Below is the method I use to setup cardboard. The setup also prepares the settings for use in a stereo image viewer web page I am working on - more of that another day!

Note if you have a lazy eye or suffer from bouts of double vision or similar eye problems, you probably shouldn't do it this way!

Sunday, 10 July 2016

Making google cardboard work properly (with a web browser) part 1

First experiences with Google Cardboard were that things looked 3D, but it always felt a bit weird and uncomfortable. Usually the 'not rightness' got worse as I looked further from the centre of the image. To start with, I messed around with profile generator, but soon came to the conclusion I was starting from the wrong place.
Could I make it better?

Having worked out what I thought was the problem, the answer is yes, it can be made LOTS better (well it is for me anyway)

I decided that there are 2 main problems:
  1. because the lens spacing doesn't match my ipd, and the lenses have a fair bit of distortion, there is a small sweet spot and as I looked away from the sweet spot, the 2 views diverge in ways my brain did not like. This makes things feel more and more 'not right' as you move further from the centre.
  2. The lenses introduce a lot of pincushion distortion - I suspected that while not ideal, things would look a whole lot better if the spacing is fixed even with this distortion.
Of course having fixed item 1, a new profile should make the google app (and others that use the underlying cardboard API) look a whole lot better as well - after generating a new profile.

Google cardboard is set up for an ipd of around 64mm, and I measure my eyes at 67mm, but even this small difference seems to have a big effect.

So I set off a couple of days ago to:

  1. fix the ipd to lens mismatch.
  2. write an app (web page) that would allow me to view stereo pictures in a web browser.
and so our quest begins.... Part 1 is below, part 2 is here

Sunday, 3 July 2016

Pi Zero with steerable pi camera

I wondered how minimal I could go for a pi based camera, both in terms of size, power and to a lesser extent cost. I have been using webcams, but I soon found that even on a pi 3, 2 USB webcams wouldn't run reliably at more than very basic resolution under motion.

I decided to see how far I could go with a Pi Zero and a pi camera. Of course this means I can only put 1 camera on the Pi, but I gain flexibility in that the cameras are no longer USB cable length limited.

The result is very successful:

I also decided to I to try making the camera steerable using this little adafruit gadget.

Here is the final BOM:
  1. Raspberry Pi Zero with basic case and kit of leads
  2. Raspberry Pi Camera (mk 2)
  3. Raspberry Pi 2 Camera cable
  4. Adafruit mini pan tilt kit
  5. a few bits of wire
  6. 220uF & 100nF capacitors
  7. High power usb wart
  8. oh yes and a wifi or lan dongle
Total cost about £60 if you have to buy it all.

You will also need a usb hub for initial setup at least (I run mine with just the wifi dongle, so I don't need a hub)

The parts of this I was concerned about were:
  1. Were the servos and the pan tilt kit going to be stable / accurate enough?
  2. Would a single core processor cause glitching or other problems?
  3. Could I drive the servos from the Pi's 5v supply? (they draw about 250mA running, 600mA stalled and 10mA idling.)
  4.  Was there a reasonable way to route the ribbon cable?
 And the answers (so far):
  1. just about
  2. No, all looking good (using pigpio to drive the motors)
  3. Yes, adding the capacitors improved stability (of the motors - the Pi was fine)
  4. meh - ribbon cables are always a pain with 2 axis movement.
One arising questions:
  1. is it safe to run the 5v servo supply from pin 2?
Well on the Zero there is no fuse between the usb power socket and pins 2/4 so assuming your servos are well behaved, then yes. On other recent models the polyfuse has been uprated to 2A, so those should be fine as well.

Monday, 27 June 2016

Live imaging with Google cardboard

3D viewing of live data - or perhaps timelapse video sounded fun, and I especially wanted to have a go at cloud timelapse with extra large camera spacing - since I have a great view of the sky to the north from our house.

While there is lots of content out there, and apps that do fake 3d from single photos (with much the same results as fake stereo from mono in the 1980's), there didn't seem to be much info about roll your own. Well after a few hours messing about and a lot of lessons learned things are looking pretty good.

After a bit of judicious makery, here is a snapshot of the web page that displays live images from 2 webcams. This isn't proper video, this is 1 frame per second served up by motion and stuck into a single web page using some simple html that allows some tweaking. The reason for upside down and the html is all explained below. The webcams here are 2.3m apart.

Displayed on an original Nexus 7 in Google Cardboard (painlessly extended to accept the larger device), this looks pretty good, although the screen door effect is blatant.

The standard Google app is about a 'VR experience', but I am far more interested in a straight 3d image viewer - along the lines of the old viewmasters, So I am not expecting (so far!) any ability to track head motion. While there are a couple of 'ordinary' stereo image viewers around they only work with static images - not streams.

Of course looking through 2 high magnification lenses at a phone screen 2 - 3 inches away is never going to be that wonderful, but resolution keeps improving so next year.......

Below is some detail on what I have done and how I have done it.

Tuesday, 21 June 2016

Finally! 800 steps per second - Stepper control with a Raspberry Pi and Pololu A4988 drive carrier

800 steps per second on multiple motors!

Well I think this is about as good as it will get. The hardware is Pololu A4988 drive carriers controlled directly from Raspberry Pi io pins. The test software is some fairly straightforward Python code the uses pigpio to do all the donkey work. By increasing the power supply to 24v (after carefully setting up the current limiting on the Pololu boards) I can got to around 800 full steps per second with moderately good torque and stability. Faster rates do work, but torque falls off rapidly, and any real load stalls the motors quite easily.

On this journey, which is detailed in earlier posts, I achieved the maximum step rates as follows:

 AdaFruit DC & stepper HAT (standard code)
75 - 80 steps per second.

 AdaFruit DC & stepper HAT (modded code)
 260 - 280 steps per second.

Pololu driver board direct gpio with pigpio, 12 volt supply
400 steps per second.

 Pololu driver board direct gpio with pigpio, 24 volt supply
800 steps per second. (limited by stepper - much higher rates could be achieved with other steppers.)

All the gory detail follows......

Wednesday, 15 June 2016

Better stepping with an A4988 based controller.

I wired up a single stepper driver board today on a baby breadboard and after a lot of firkling about I have this running pretty smoothly using the pigpio library.

I have been testing to see the maximum speed I can reach with this setup, and it comfortably reaches just over 400 full steps per second in 1/2 step mode (so I am kicking the step input 800 times a second.

1/2 step mode gives the fastest rotation and also has the most torque. All other modes tend to fall into stuck jitter well below 400 steps per minute.

I am currently running the rig off 12volts. I am going to try 24 volts (with a suitable adjustment to the current limiter!) as this should give me a bit more speed.


Wednesday, 1 June 2016

getting more out of an Adafruit DC & Stepper Motor HAT

As described in an earlier post, this HAT is really only doing stepper motor control as an afterthought, so limited the step rate to just under 80 per second.

However after rummaging around in the code while developing a driver for my telescope mount, I noticed that the Adafruit code is pretty basic and makes no attempt at optimisation.

With some simple changes to the Adafruit code I have managed to improve the step rate to around 280 per second peak. This also means that there is less jitter in the pulse timing as well.

Tuesday, 3 May 2016

Adafruit DC and Stepper Motor HAT is not much good at steppers really

Well I have setup my Adafruit DC and Stepper Motor HAT, and it does drive the stepper motors, but has....   certain limitations!

This is all down to the HAT doing everything over I2C, and because the HAT requires a prod for each step (including each individual sub step in micro step mode), this limits the step rate to how fast the commands can be poked down the (not very fast) I2C bus.

The max rate is around 75 - 80 commands per second - so with 2 motors to move I can only do around 40 per second. Any attempt to go faster just blocks in the Adafruit library calls to prod the motor. The CPU utilisation though remains low, so that part at least is sensible.

However tracking stars and autoguiding should be fine with this rate (sidereal tracking needs just under 10 per second), so I shall carry on with some software and also prepare to go for Pololu A4988, set up to drive the stepping direct from GPIO pins.

In the meantime I intend to use lin_guider to track a star and report deviation over UDP, I shall write a program to pick up the deviation and directly drive the steppers through a full PID implementation. I have a PID controller I wrote earlier which I can use for this, the only hiccup at the moment is that the Adafruit software only appears to be available or Python 2 *sigh*.

Saturday, 30 April 2016

Telescope with Raspberry Pi - stepper motoring

On the few occasions that the weather has co-operated I have been testing tracking with the setup described earlier. It has not worked well. Tracking was very occasionally good, mostly mediocre and sometimes dire.

I have though much improved the wifi access by setting up an external access point. The signal is now excellent and remote desktop from inside to the pi on the 'scope works well. I used an outdoor ap with cheapo power over ethernet all stuck onto the house with a cheap aerial mounting kit from B&Q.
  1. 7dBi GSM 4G Penta-Band Panel Antenna N-Type
  2. ALFA TUBE2H 150Mbp/s 2.4Ghz Long Range Outdoor Ethernet WiFi AP/CPE with N-Type Connector
I wrote a trivial python script to pulse the ST4 interface to see what was happening at the coal face and it was not pretty.

At the 1.5x speed setting on the DD-1 controller pulses long enough to cause 3 steps were actually doing from 0 to 3 steps, very few were 3, and quite a lot were 0, this was with the mount indoors and no load. A bit of back pressure against the direction of movement made the situation significantly worse.

Increasing the speed setting to 2x helped quite a bit, but any significant load still saw the difference between intended steps and actual steps increase dramatically. I could hear the pulses on the motor, but they were not causing the motor to actually step.

I saw 2 ways forward:
  1. buy an EQ5 goto upgrade kit - these fit the old Vixen mounts with very little adaptation, but they cost around £300.
  2. go diy with a raspberry pi stepper motor HAT using the existing motors, cost circa £20.
And being keen to get to grips with stepper  motor magic for other reasons as well, I went with option 2.

Order has just arrived so I will be busy for a few days.........

Well some success, but not quite what I expected!

Wednesday, 9 March 2016

Telescope with Raspberry Pi

Notes and Info on using a Raspberry Pi with my telescope

Not going to say much about my scope other than it is using a Vixen GP mount which had an ra drive fitted when I bought it, and I am fitting a dec motor to it. Both motors are vixen MT1 and I have a hand controller DD-1.

I'm first of all planning to add an ST4 interface to the controller, which looks pretty simple, and then use a PiFace to drive the interface. I'll then use Linguider to give me an autoguide capability. I'll look at adding goto later.

(Well, adding an ST4 interface to the DD1 didn't go too well.... )

I'm using Raspberry Pi, 'cos I have a couple already doing other things and I like them, plus it's nice low power so I can run on batteries, and lots of people are using them as telescope controllers. The GPIO on the pi means I can drive various things direct, rather than through various adapters, although I will use a PiFace to protect the pi and give me a bit more drive (the built in output pins are only 3.3v and very limited current).

I'm using linguider 'cos I've read in many places that it works far better on pi than the other obvious alternative - openphd, plus I relatively easily added support for driving piface outputs to it.

This setup all works, although I need to tweak the settings of lin_guider and / or the scope alignment to get a nice tight tracking. lin_guider reports a swing on tracking of around 6 - 8 arc seconds on 1 axis (the other axis is < 1 arc second). This is a 2 minute exposure with a 560mm lens on a crop frame camera. If you open up this piccy (which is a big crop from the original) you will see all the smaller stars are slight stripes.

This setup looks like it will work well for tracking, but as I can't change the speed of the motors except by moving the switch on the DD-1, goto is not going to be seamless.

Friday, 8 January 2016

Lego Mindstorm EV3 motors - some performance info under EV3DEV

I'm getting ready to write some nice control software for my Lego motors and have done some initial tests to see how they perform.

This graph shows how rpm varies with duty cycle, no load and powered by a rechargeable battery at 7.4v (the battery was under charge as well)

For real use normally one would use rpm regulated mode of course.

Unless you need the ultimate rpm, the large motor is a more consistent performer.

Sunday, 3 January 2016

Mindstorming with Python

The motors that come with the Lego Mindstorms EV3 comes with motors with positional feedback and reasonably sophisticated controls. The 'brick' that interfaces with all the widgets can also easily be hacked to enable use of sensible programming languages rather than the visual language (which has some significant limitations) that Lego have developed.

The ev3dev update is especially good as it can easily be removed to revert back to the original state (it is installed on an SD card and no changes are made to the controller).

So here is a quick blog of what I have done to get up and riunning with python on the EV3. I did fall down a couple of bear pits along the way, so this describes how to get to a working solution.